
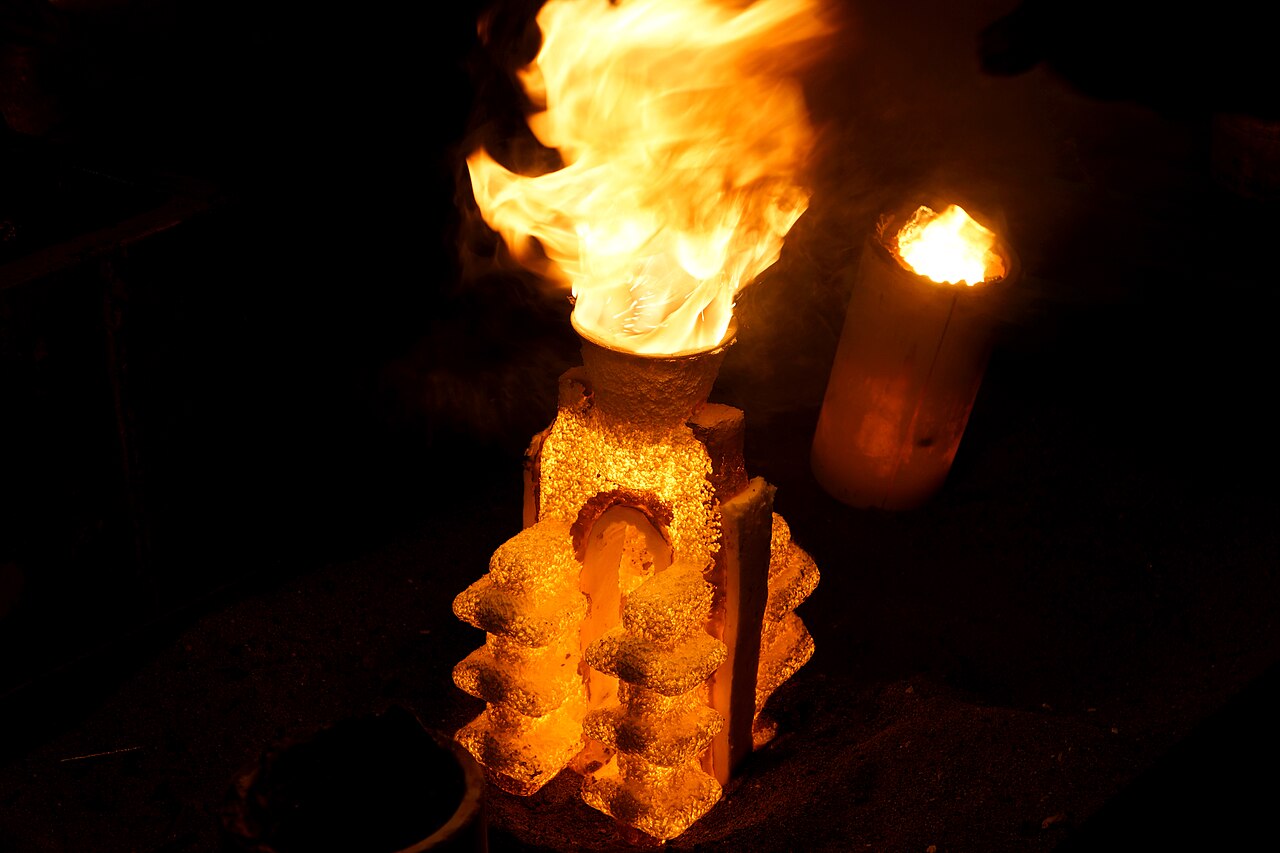
A desktop printer can make the pattern for a real metal part. Print it in a filament made to burn away, bury it in plaster, bake the plaster until the print is gone, and pour molten aluminum into the hole it left behind. The process is called lost-PLA casting, a cousin of the lost-wax method jewelers have used for centuries. This guide walks through it step by step and lists what to order for each one.
Start with aluminum. It melts around 660 °C, a propane furnace handles it easily, and a bad pour costs you a few dollars of scrap. Bronze and silver use the same equipment at higher temperatures once you have the basics down.
Step 1: Print the pattern in a filament that burns away
Ordinary PLA leaves ash in the mold. Polymaker's PolyCast is a PVB filament made for this job: Polymaker rates its ash residue after burnout at 0.003%, and the surface can be smoothed with isopropyl alcohol so layer lines do not print into the metal. It prints like PLA, at a 190–220 °C nozzle and a 25–70 °C bed, but it is moisture-sensitive, so dry it at 50 °C for 12 hours first. Print it with two or three walls and light infill so there is less to burn out, best surface up.

Polymaker PolyCast PVB Filament, 1.75 mm, 0.75 kg
PVB · 0.003% ash after burnout · IPA-smoothable
The only consumable on this list that has no substitute. One spool prints dozens of patterns.
Step 2: Sprue it and set it in a flask
Molten metal needs a channel into the mold and air needs a way out. Attach a wax sprue to the thickest part of the pattern with a heated tool, add a thin vent to any high pocket, and stand the pattern on a rubber sprue base. A steel flask slides over the base and holds the plaster.

Sprue Wax Sticks, 1 lb, 8–16 mm
Solid wax rods · several diameters · melt on with a heated tool
Wax burns out with the pattern. Use a rod thick enough that the metal reaches the mold before it freezes.

DZQ 3″ × 4″ Casting Flask with Rubber Sprue Base
Stainless steel · rubber base forms the pour cup · reusable
Size the flask so there is at least 12 mm of plaster around every part of the pattern.
Step 3: Invest, and treat the powder as a lung hazard
Investment is a gypsum-and-silica plaster made for casting. Ransom & Randolph's Plasticast is formulated for low-temperature alloys with wax and plastic patterns and is designed to break away with a water quench, which is what you want with a printed pattern. Mix it to the maker's water ratio, pour it around the pattern, and tap the flask to bring bubbles to the top. Let it cure overnight.
The dust is the dangerous part. OSHA's silica health page is blunt: breathing respirable crystalline silica causes silicosis, an incurable lung disease, as well as lung cancer. Mix investment with a fitted P100 respirator on, outdoors or under extraction, and wipe up with water instead of sweeping.

Prestige ORO Jewelry Casting Investment Powder, 5 lb
Gypsum-bonded investment · for lost-wax and printed patterns · 5 lb fills several small flasks
A gypsum-bonded jewelry investment that hobbyists also use for aluminum and brass. Follow the water ratio on the bag exactly.

3M 65021 P100/OV Reusable Respirator
NIOSH-approved · P100 particulate plus organic vapor cartridges · half face
Filters silica dust when you mix and the fumes that come off a burning pattern. Fit it before you open the bag.
Step 4: Burn the pattern out
The flask goes into a kiln upside down so the pattern can drain and burn. Polymaker's guidance for PolyCast is a burnout at 1,100–1,200 °C for complete removal, or a much longer cycle if your kiln cannot reach that. Ramp up slowly so steam does not crack the plaster, hold at the top temperature for a few hours, then bring the flask down to the pouring temperature the investment maker specifies. Do this outdoors or with the kiln vented; a burning pattern smokes.

TableTop USA Hi-Temp 2200 °F Programmable Burnout Kiln
2,200 °F (1,204 °C) · programmable ramps and holds · vent hole
The one kiln here that reaches Polymaker's full burnout range and runs an unattended multi-stage schedule.
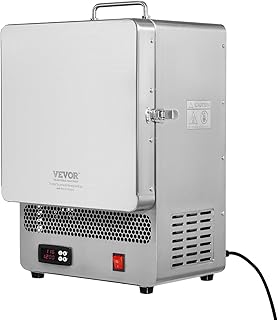
VEVOR 1500 W Electric Kiln, 1,200 °C
Tabletop · 1,200 °C maximum · manual controller
Cheaper and it hits the temperature, but you set each ramp by hand. Fine for small flasks and patient people.
Step 5: Melt and pour
A propane furnace melts aluminum in a graphite crucible in about 20 minutes. Skim the dross off the top, lift the crucible with proper tongs, and pour in one steady motion until the cup is full. Everything within reach must be dry: water under molten metal flashes to steam explosively, which is why the flask is pre-heated and the pour area is bare concrete or sand.

Nelyrho 6 kg Propane Melting Furnace Kit
Rated to 2,500 °F · stainless shell · comes with crucible and tongs
Enough capacity for parts up to a few hundred grams. Runs off a standard propane cylinder.

CANALHOUT 3.5 kg Graphite Crucible with Pouring Spout
Clay-graphite · spout for a controlled pour · fits the 6 kg furnace
Crucibles are consumables. Keep a second one so a crack never ends the day.

ProCast 26″ Foundry Crucible Tongs
26″ reach · grips graphite crucibles · steel
Kit tongs are short. Length keeps your hands and face away from the crucible.
Step 6: Dress for it
Radiant heat from an open furnace burns exposed skin at arm's length, and a splash is worse. Wear leather from the neck down, aluminized gloves, and a face shield, with cotton or wool underneath. Synthetic clothing melts into skin.
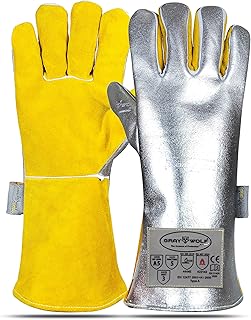
Graywolf Aluminized Heat Resistant Gloves
Aluminized back · Kevlar lined · rated to 1,472 °F
Reflective backs matter at the furnace mouth. Plain welding gloves get hot fast.

Oberon Heat Reflective Face Shield
Gold-coated visor reflects radiant heat · ratchet headgear
The same style foundry workers wear. A clear shield stops splash but not the heat.

QeeLink Leather Welding Apron
Split leather · six pockets · adjustable straps
Covers the chest and lap where a dropped crucible lands.
Step 7: Quench, cut and finish
Let the casting cool until the metal is solid, then quench the flask in a bucket of water. The investment breaks up and the part comes out grey and rough. Cut the sprue with a hacksaw, file the stub, and finish with the tools already on your bench: flush cutters for thin vents, a deburring tool for edges and calipers to check that the part shrank the amount you planned for. Aluminum shrinks about 1.3% as it cools, so scale the model up by that much before printing.
What to buy first
Order the respirator, the filament, investment and a flask first, and borrow kiln time at a makerspace or jewelry class for your first burnout before spending on your own. When you are ready to pour, the furnace kit, tongs and safety gear come as one purchase. A full aluminum setup lands at a few hundred dollars, and after that each casting costs a few grams of filament, a cup of plaster and a tank of propane.
