
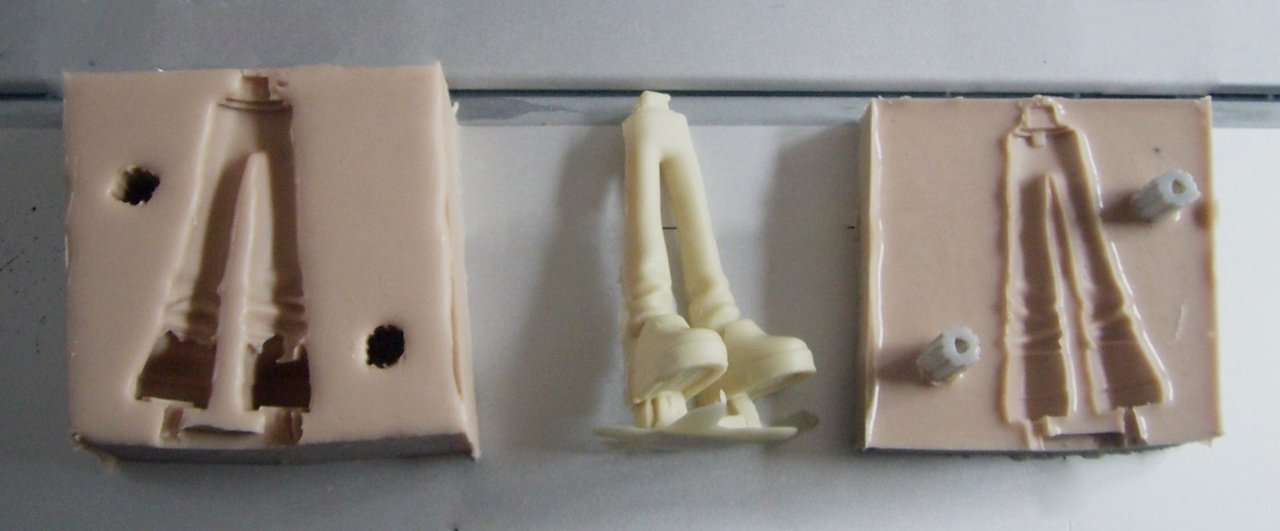
A printer makes one part in an hour. A silicone mold of that part makes a copy in ten minutes, in a material the printer cannot handle: hard white resin, glycerin soap, plaster, wax or concrete. Print the master once, finish it, box it, pour silicone over it, and cast from the rubber for as long as it lasts. This guide walks through each step and lists what to order for it.
Step 1: Print and finish the master
Silicone copies everything, including layer lines. Print the master at a fine layer height with the best surface facing up, then prime and sand it until it feels like plastic from a store. A high-build filler primer does most of the work; two coats fill the steps between layers and you sand back to a smooth skin with wet paper from 400 grit upward. Give the master a flat back to sit on the box floor and no deep undercuts that would lock the rubber in.

Rust-Oleum 249279 Automotive Filler Primer, 11 oz
High-build sandable primer · grey · aerosol
Two coats fill the layer steps so you sand a skin, not the whole print.

45-Piece Wet/Dry Sandpaper Assortment, 400–3000 Grit
Nine grits · wet sanding · 9 × 3.6″ sheets
Work up through the grits with water. Every scratch you leave here is in every casting.
Step 2: Build the mold box
A mold box is four walls and a floor with the master fixed in the middle; hot-glued foam board or acrylic works. Leave a finger's width between the master and each wall, and glue the master down so it cannot float when the silicone goes in. For a two-part mold, bed the master halfway into clay, add registration keys and pour one side at a time.
Clay choice matters more than it looks. Smooth-On's OOMOO instructions list sulfur-based modeling clays and latex rubber among the materials that cause cure inhibition, where the silicone against them stays sticky forever. Use a sulfur-free clay and vinyl or nitrile gloves.

Surebonder H-270 40 W High-Temperature Hot Glue Gun
Full size · high temp · standard sticks
Glues foam board or acrylic walls to a base and seals the seams so silicone cannot leak out.

Monster Clay Premium Grade Modeling Clay, 4.5 lb
Oil-based sculpting clay · reusable · sold as sulfur-free
Fills gaps and builds the parting line for a two-part mold. Smooth-On warns sulfur clays stop silicone curing, so check the label of any substitute.
Step 3: Choose the silicone and mix it
Two families cover home use. Platinum-cure silicone is the better rubber: Mold Star 15 SLOW mixes 1A:1B by volume with no scale required, has a 50-minute pot life and cures in four hours to a soft Shore 15A rubber that Smooth-On rates heat resistant to 450 °F (232 °C). Its viscosity is low enough that vacuum degassing is not required for most applications, and the maker says not to cure it below 65 °F (18 °C). Tin-cure silicone is cheaper and less fussy about contamination: OOMOO 30 also mixes 1A:1B by volume, with a 30-minute pot life, a six-hour cure and a firmer Shore 30A finish, but Smooth-On is candid that OOMOO silicones do not have great tear strength and are meant for simple one- or two-piece block molds.
Mix thoroughly, scraping the cup, then transfer to a second cup and mix again; unmixed streaks are the usual cause of soft spots.

Smooth-On Mold Star 15 SLOW, Pint Unit
Platinum cure · 1A:1B by volume · 50 min pot life · 4 h cure · Shore 15A
Long working time, no degassing, heat tolerant for wax and soap. The one to buy if you only buy one.

Smooth-On OOMOO 30, Pint Unit
Tin cure · 1A:1B by volume · 30 min pot life · 6 h cure · Shore 30A
Cheaper and forgiving for simple block molds. Lower tear strength, so keep it away from thin or undercut masters.

Nicpro Silicone Measuring Cups and Stir Sticks Kit
250 ml and 100 ml cups · silicone sticks · pipettes
Cured silicone and resin peel straight out; the cups last for months.
Step 4: Pour, cure and demold
Pour a thin stream from high above the box into the lowest corner, never onto the master, and let the rubber rise over the part. Smooth-On's OOMOO instructions call for at least half an inch (1.3 cm) of rubber over the highest point of the model. Leave the box alone at room temperature for the full cure time, then peel away the walls and flex the master out.
Step 5: Cast in resin, soap or something heavier
For hard parts, a fast urethane resin is the standard. Smooth-Cast 300 mixes 1A:1B by volume, has a three-minute pot life, cures in about ten minutes to a bright white, Shore D 70 plastic and needs no degassing. Smooth-On specifies a release agent for it and names Ease Release 200, and recommends a post-cure of four to six hours at 150 °F (65 °C) for full properties. Pigment goes into part B before you combine the two.
The same mold takes melt-and-pour soap straight from the microwave, plaster or gypsum, candle wax and small concrete castings; platinum silicone shrugs off all of them.

Smooth-On Smooth-Cast 300, Pint Unit
Urethane · 1A:1B by volume · 3 min pot life · 10 min cure · Shore D 70
Bright white, low viscosity, no degassing. Work fast; three minutes is not long.

Mann Ease Release 200, 14 oz Aerosol
Mold release · the one Smooth-On names for Smooth-Cast · spray on
Urethane sticks to silicone over time; a light coat before each pour keeps the mold alive.

Mica Powder, 72 Colours, 10 g Each
Pigment for resin and soap · pearlescent · sample jars
A pinch stirred into part B before mixing. Buy the sampler, not the litre.

Velona White Melt & Pour Soap Base, 2 lb
Glycerin soap base · SLS free · microwave to melt
The same silicone mold takes soap straight from the microwave. Zero fumes, kid-safe results.
Step 6: Treat the resin as a chemical
Urethane resin is a chemical product: its raw materials are isocyanates, and OSHA's isocyanates page lists skin and mucous membrane irritation, chest tightness and difficult breathing among the health effects, with occupational asthma the main concern and some compounds classed as potential human carcinogens. Smooth-On's own instructions for OOMOO call for room-size ventilation, safety glasses, long sleeves and gloves, and for Smooth-Cast 300 we add a respirator with organic vapour cartridges. Cast with a window and a fan, and keep the resin off skin.

3M 65021 P100/OV Reusable Respirator
NIOSH-approved · organic vapour cartridges · half face
Urethane resin is an isocyanate product. Wear this with a window open, not instead of one.

Supmedic Nitrile Exam Gloves, 100 Count
Powder-free · disposable · nitrile
Nitrile for resin. Smooth-On says latex gloves inhibit the cure of OOMOO, so never latex.
What to buy first
Start with a pint of Mold Star 15 SLOW, the cup-and-stick kit, a hot glue gun and clay, and make a block mold of something small you already printed. A pint makes two or three palm-sized molds. Add Smooth-Cast 300 and the respirator when you want hard copies, or a soap base if the goal is gifts.
